You are here:

Tutorials

What is Milk Paint?

Miss Mustard Seed, Marian Parsons:

Well, first of all, it’s nothing new. It’s been around for hundreds of years and has even been discovered in cave paintings and Egyptian tombs. It’s made of milk powder, lime, and pigment, so its all natural and behaves very different from its more modern counterparts like latex and acrylics. It provides a beautiful matte finish that shows amazing variances in the colour.

Why choose Milk Paint?

It is a very unique paint that does a lot of things really well. My two very favorite things about Milk Paint are…
It is the absolute best paint for raw wood. It penetrates the wood like a stain, but looks like a paint. Since it penetrates the wood, it won’t chip off and it’s super durable.
On certain finished surfaces, it will flake away in some areas, giving a piece an authentically chippy finish you can’t get with any other paints. The way it will chip is unpredictable, so you have to be willing to go with it.

What if you don't want the chippy look on a piece with an existing finish?

No problem. There is a bonding agent that can be added directly to the first coat of paint. It will make the paint adhere to existing finishes, other types of paint, metal, glass, and other slick surfaces. It does help to rough up the surface with sand paper a bit prior to painting, but it’s not necessary. In fact, I haven’t sanded any of the pieces I’ve painted with Milk Paint. I even painted a hutch with an old oil based finish. I didn’t sand, but I added some of the bonding agent to the first coat and it stuck beautifully.

What is the paint supposed to look like it's mixed?

I’ve always mixed it by hand, but a blender will make the paint even smoother. I sort of like feeling the consistency when I’m stirring it, but that’s just me. The cool thing about milk paint is you can make it the consistency that works for your project. Sometimes I like it very watery for a wash or a translucent coat and other times I like it thick, so it brushes on more opaque. It definitely feels more watery than latex, acrylic or Chalk Paint, so don’t expect that thick, smooth body you’ve become used to. It’s also pretty common to have a lump here or there and to have to stir it occasionally. When you brush the paint on, though, the lumps work themselves out. I have also found if you let the mixed paint sit for about an hour before using it, the powder is absorbed into the water and it’s a bit smoother.
Milk Paint is the sort of product you start using and it’s so different from other paints that you think you’ve messed it all up. My mom helped me with painting my Mustard Seed dresser and she kept calling me over to make sure it was right. That is why we have lots of tutorials and education available to support you. Milk Paint does have a learning curve. Because it’s 100% natural, it doesn’t have chemicals in it that make it smooth and creamy like modern paints. I have found, though, that the more I use milk paint, the more I love it. I hope you feel the same way.

Chippy goodness!

One of our favorite looks to create with MMSMP is the “chippy look.” If you have watched our tutorials, you will understand that milk paint will chip on surfaces that have been previously finished. In this case today, the dresser was painted with a gold paint previously. It had some obvious wear. The areas that are dull will absorb more milk paint, therefore adhere, and the other “shiny” surfaces will resist, resulting in chip.

What you need:

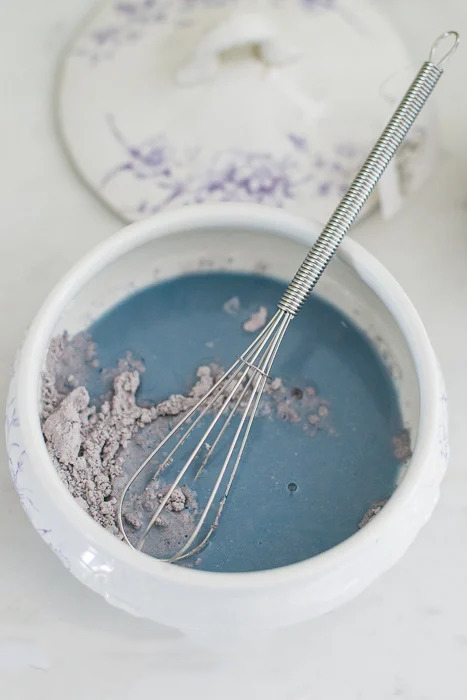
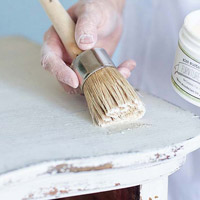
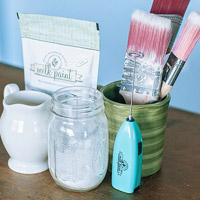
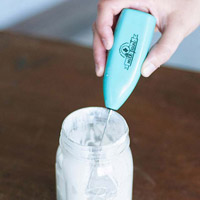
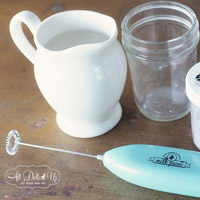
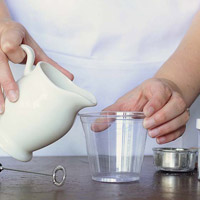
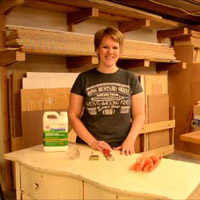
Milk Paint, equal parts water, a whisk, frother, or blender, cup or container, and brush.
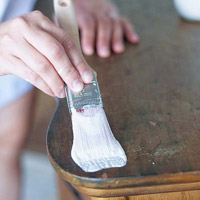
Since we want to create a worn farmhouse feel, we aren’t prepping to allow the paint to chip.
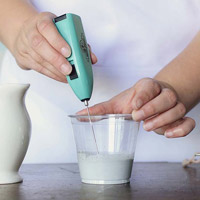
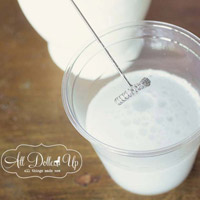
I am using the adorable new mixers! They make mixing a snap!
Apply your paint in nice even strokes, not too heavy to prevent dripping. Remember lighter colours will need more coats for better coverage.
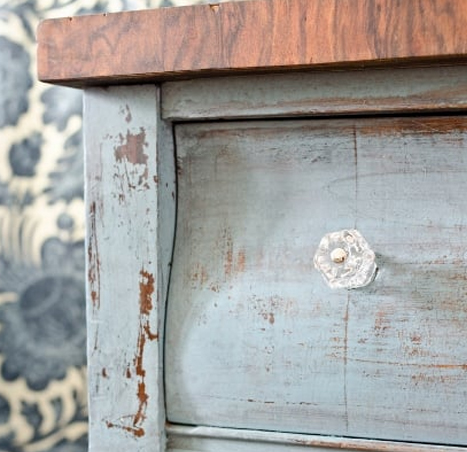
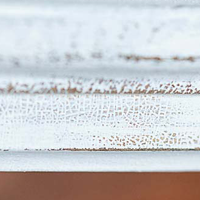
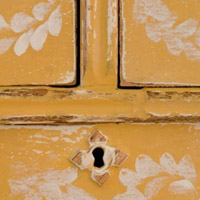
You will love how fast milk paint dries! In this case by the time I finished one side, the side we began with was dry. You might see the paint chip and peel immediately. If not, using a fine grit sanding block will loosen any paint that would eventually chip off.
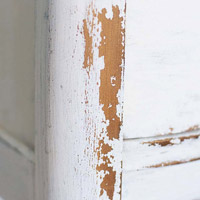
While distressing and smoothing your dried paint, the milk paint will sand off in a fine powder. Be sure to wipe your pieces down after this step. (And wash your hands! Notice I obviously didn’t!)
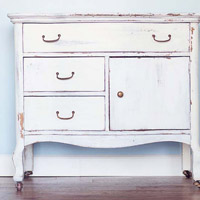
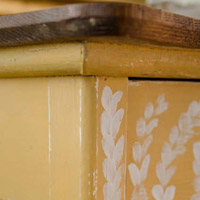
To seal in the piece, and create a durable top coat, I am using MMSMP Furniture wax. Although it looks yellowish in the tub, it will dry clear and richen your flat, chalky, dried paint back to its true colour.
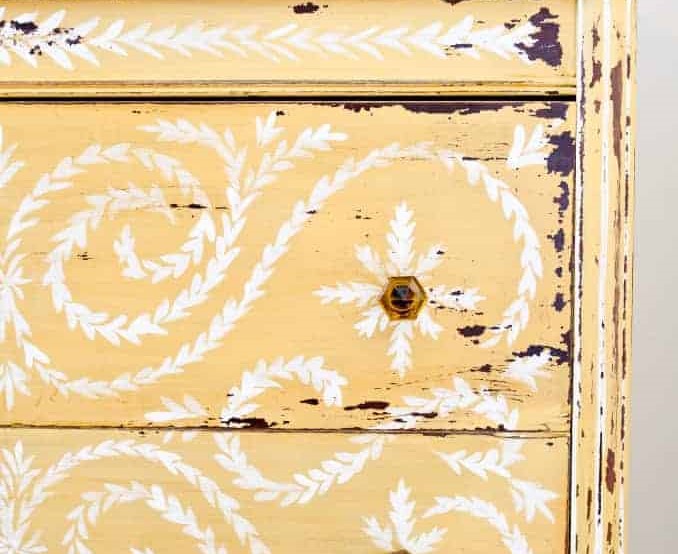
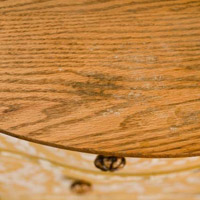
After you wax, let your piece cure and enjoy the beauty of a total transformation! Check out the natural crackle effect happening here over the old finish! There truly is no other paint that will do this on its own!
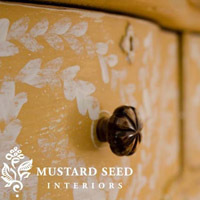
From start to finish this took us an afternoon. Linen made this piece bright and happy- yet maintaining the lived in and worn feel of an aged farmhouse piece!

Using a Frother to mix the paint

There is a bunch of ways to mix milk paint to get a lump-free, creamy mix, but one of our favourite ways is using a milk frother. After testing them out for a few months, we finally had some custom made to carry with the paint line! And now the new Milk Paint Mixer’s are in! They are just as cute as they are handy. The benefits of this little guy are endless- but there are some tips to using it that I would love to share with you so that you get a perfect mix every time!
You will need 2 AA batteries for the frother. We love that it’s portable and doesn’t need a plug! It’s compact and really packs a punch for its small size.
Dip the mixer in all the way to the bottom. Because of the speed of the mixer, make sure it touches the bottom of the cup, to prevent it from splashing all over the place! If you allow it to spin too much on top, there will also be lots of air bubbles.
The mixer will stop when you apply pressure. Push the mixer up and down doing short little “pounces” on the bottom of the cup to prevent from making a milk paint latte! A few times in class I glance over at friends who are frothing and chatting away and before they know it they have a foam head as tall as their cup and the paint is way too thin and airy. Light and airy is great for latte’s, but could make for several unnecessary coats when painting.
If the paint is too thick, slowly pour in water while mixing to thin the paint. Think of making pancake batter… (I know, I told you – food again!)
Have a separate cup of clean water- dip your mixer in right after mixing, turn it on and hold it in, spinning for a few seconds. Pull it out and it will be clean as a whistle! * Make sure you do this soon after painting, so the milk paint doesn’t harden in the coil.
After mixing the paint, there may be some air bubbles collected at the top. Don’t worry. Just start painting and work it out with the brush.
If you want to err on the side of caution, just wait a few minutes (or go grab a snack like mac-n-cheese or pancakes) and the bubbles will dissipate!

Painting over existing finishes can you paint milk paint over other painted finishes? Yes, you can!

This little dresser has been hanging around in my basement for a while and, after selling some other pieces; I was forced to work on it. The delay wasn’t because I didn’t like the piece, but because the drawer bottoms were jacked up and needed to be replaced. Pieces that need repair often get put on the back burner. I couldn’t find a before picture of this piece, so here’s the best I could do…
A snapshot from the Removing Paint Part One video on the Miss Mustard Seed You Tube channel. It had a few layers of paint, the last one being a white oil based paint that had yellowed and cracked over time. I removed the paint off the top and painted the base in Mustard Seed Yellow with some bonding agent added, because I wanted to have control over the amount of distressing that happened.
I added some hand painted detailing to this piece, since I loved the last Mustard Seed Yellow dresser I did (and it lasted only about 2 hours at the Lucketts Antique Market.)
A snapshot from the “Removing Paint Part One” video on the Miss Mustard Seed You Tube channel.
It had a few layers of paint, the last one being a white oil based paint that had yellowed and cracked over time.
I removed the paint off the top and painted the base in Mustard Seed Yellow with some bonding agent added, because I wanted to have control over the amount of distressing that happened.
Once I stripped the paint off the top, I did notice some imperfections in the wood, but I think it only adds to the character of the piece. I applied a coat of Hemp Oil to hydrate the wood, followed by some dark walnut stain, which I wiped away quickly, so it didn’t get too dark. I finished with a coat of Furniture Wax and a good buffing. It’s a buttery soft finish now.
My husband replaced the drawer bottoms, so they’re sturdy and clean.
I lightly sanded the dresser once the hand painting had dried. The texture of the paint underneath showed through beautifully, and I took the distressing down to the wood in a few places.